Difference between revisions of "Documentation:Web Conferencing"
ColinMadland (talk | contribs) |
ColinMadland (talk | contribs) |
||
| Line 7: | Line 7: | ||
TRU supports the use of Big Blue Button, an open source web conferencing tool. Big Blue Button is integrated with both Blackboard Learn and Moodle, making it easy for instructors to create and deploy sessions with just a few clicks. | TRU supports the use of Big Blue Button, an open source web conferencing tool. Big Blue Button is integrated with both Blackboard Learn and Moodle, making it easy for instructors to create and deploy sessions with just a few clicks. | ||
| − | [[Documentation:Web_Conferencing/ | + | [[Documentation:Web_Conferencing/Using_BigBlueButton|'''Using Big Blue Button''']] |
===Blackboard Learn=== | ===Blackboard Learn=== | ||
Latest revision as of 14:47, 23 February 2016
Overview
Web conferencing tools allow you to connect with students from a distance and also share documents, display your screen on participants' monitors (and vice versa), and allow remote students to give presentations to you and your class. You may also use web conferencing tools to host guest speakers to your class for a conversation without them having to travel to Kamloops.
Big Blue Button
TRU supports the use of Big Blue Button, an open source web conferencing tool. Big Blue Button is integrated with both Blackboard Learn and Moodle, making it easy for instructors to create and deploy sessions with just a few clicks.
Blackboard Learn
To create a web conferencing session in Blackboard Learn, make sure the 'Edit Mode' is on, navigate to your homepage or another content area, hover over 'Tools', and choose 'Big Blue Button'.
Enter a meaningful title, and an optional description.
If you need to upload a file, such as a slide deck, click 'Browse Computer'.
The default settings will ensure that the link is visible and accessible to students. Click 'Submit' to deploy the link.
The link will be automatically deployed on the page.
Moodle
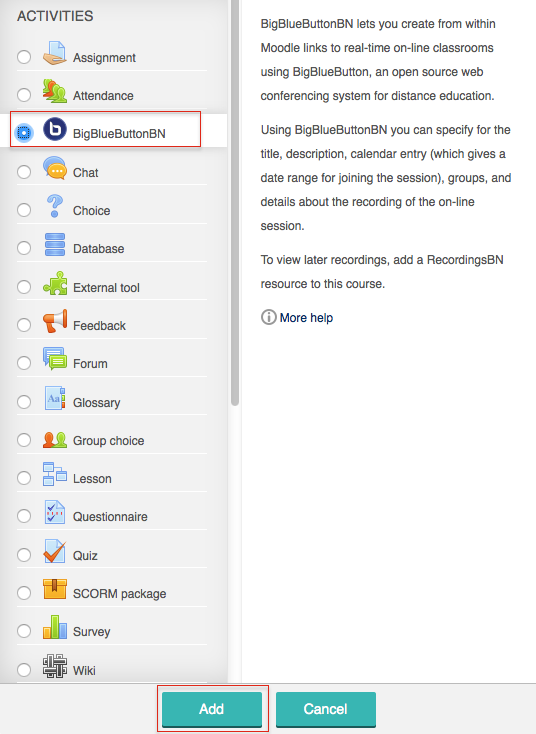
With editing enabled, click 'Add an activity or resource'.
Choose 'Big Blue Button' and click 'Add'
Provide a meaningful name for the link.
Click 'Show more' for more advanced options.
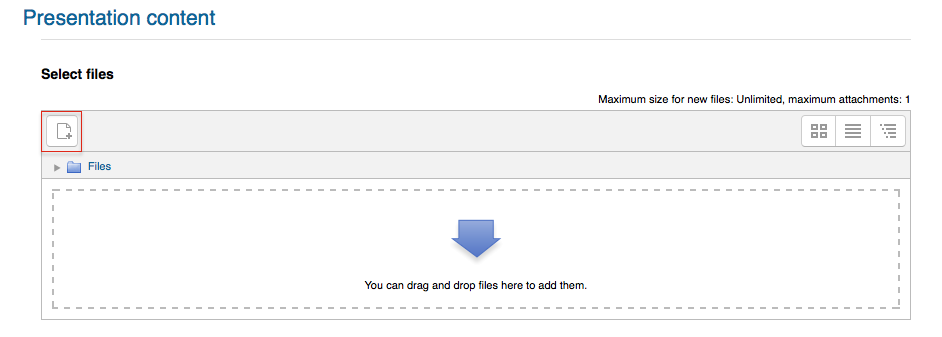
Click the upload button in the top left corner to upload your slide deck. Alternately, you may drag files from your desktop.
Click 'Participants' if you would like to change how participants are enrolled into the conference.
Under 'Schedule for session', you can enable start and end dates for the conference.
Click 'Save and return to course' or 'Save and display' to deploy the conference.
Click the pencil icon beside the title of the conference to fix your spelling mistake, or click 'Edit' to adjust the settings.


