Difference between revisions of "Documentation:Blackboard Learn Support Resources/Creating and Using Blog"
Jump to navigation
Jump to search
| Line 9: | Line 9: | ||
* 2. Before students can access a blog, the instructor must first create a blog and adjust its settings to make it accessible. | * 2. Before students can access a blog, the instructor must first create a blog and adjust its settings to make it accessible. | ||
Click ‘Create Blog’. | Click ‘Create Blog’. | ||
| + | [[File:Blog_2.png|450px|centre]] | ||
* 3. Give the blog a name and provide instructions. | * 3. Give the blog a name and provide instructions. | ||
| + | [[File:Blog_3.png|450px|centre]] | ||
* 4. Make the blog available to students and set any date or time restrictions that are necessary. | * 4. Make the blog available to students and set any date or time restrictions that are necessary. | ||
| − | * 5. Choose whether the blog will be assigned to all students individually or whether it will be a course blog and whether anonymous comments will be allowed. | + | [[File:Blog_4.png|450px|centre]] |
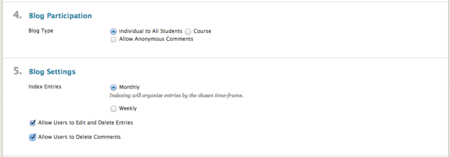
| + | * 5. Choose whether the blog will be assigned to all students individually or whether it will be a course blog and whether anonymous comments will be allowed.[[File:Blog_5.png|450px|centre]] | ||
* Adjust the blog settings with respect to indexing and allowing users to edit or delete items. | * Adjust the blog settings with respect to indexing and allowing users to edit or delete items. | ||
* 6. If the blog is to be graded, you may indicate a due date and attach or create a rubric. | * 6. If the blog is to be graded, you may indicate a due date and attach or create a rubric. | ||
Revision as of 13:06, 26 January 2015
Instructions for Blackboard Learn 9.1: Using Blogs
The blog tool allows students to create and share an online reflective diary for coursework. Follow these instructions to create a blog and edit its settings.
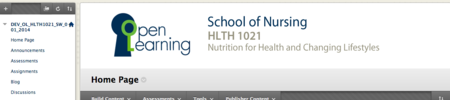
- 1. Click the link to the blog tool (you may have to add the tool to a content area first).

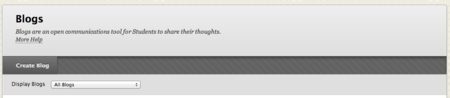
- 2. Before students can access a blog, the instructor must first create a blog and adjust its settings to make it accessible.
Click ‘Create Blog’.

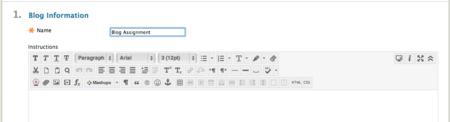
- 3. Give the blog a name and provide instructions.

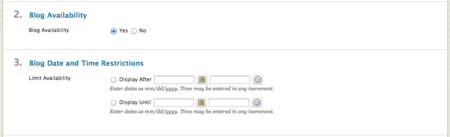
- 4. Make the blog available to students and set any date or time restrictions that are necessary.

- 5. Choose whether the blog will be assigned to all students individually or whether it will be a course blog and whether anonymous comments will be allowed.
- Adjust the blog settings with respect to indexing and allowing users to edit or delete items.
- 6. If the blog is to be graded, you may indicate a due date and attach or create a rubric.
- 7. Click ‘Submit’ to save your work.

If you have questions, please contact elearningfacilitator@tru.ca.