Documentation:Blackboard Learn Support Resources/assignments
Assignments
Blackboard Learn features many significant enhancements to faculty workflow when grading assignments, including the ability to annotate and grade student work right in your browser. Please note: OLFMs must still enter grades into myTRU. Entering grades into Blackboard does NOT trigger an assignment pay.
Instructions for Blackboard Learn 9.1: Grading Assignments
1. From any page in your course, click ‘Grade Center’, then ‘Full Grade Center’. Overview of the Full Grade Center Use the tools in the grey toolbar to customize the grade center.
- Sort by ‘Last Name’ , ‘First Name’ or by assignment by clicking the column headers.
- Click the drop down arrow beside a column header title to see more options.
- Hover over an icon or click ‘Icon Legend’ to see what an icon indicates.
- Click on an icon to enter a grade directly.
- Click the dropdown arrow beside the title of a gradable column and choose ‘Grade Attempts’.
Note: There are multiple ways that a student’s submission may be displayed, depending upon the type of submission: -’Submission Text’ is text entered directly into the assignment submission textbox and cannot be annotated . -Uploaded MS Office* or PDF documents will appear in a ‘crocodoc’ viewer and can be annotated. -A download link will appear if students upload a filetype different from MS Office or PDF. This file cannot be annotated online 2. You can read the student’s submission right in your browser unless the student uploaded a filetype other than MS Office* or PDF.
- Supported filetypes end with the
following extensions: -.doc or .docx -.ppt or .pptx -.xls or .xlsx -.pdf 2 3. Enter the student’s grade in the ‘Attempt’ line. Click the ‘Grading Notes’ button in the ‘Attempt’ line to enter notes for yourself. These notes are not shown to the student. Enter feedback for the student in the ‘Grader Feedback’ box, OR, Attach your feedback file by clicking the paper clip in the bottom left corner. Click ‘Submit’ to return the assignment to the student. 4. If your student uploads an MS Office or PDF file, you may annotate the submission using the crocodoc tool. Highlight a section of text and then click ‘Comment’ for options. You can enter comments, draw, highlight text, enter textboxes or strikeout text (see bottom image). Enter the student’s grade and any comments as in #3, above. Click ‘Submit’ to return the assignment to the student. Note: You may notice that entering comments in crocodoc requires a widescreen monitor. 5. Unsupported filetypes are displayed with a ‘Download’ link for offline viewing. 3 Needs Grading 1. You may also click ‘Needs Grading’ under the ‘Grade Center’ link to access a list of assignments which need grading. Click ‘Grade All’ to begin grading assignments. Click ‘Filter’ to show or hide the filter bar. Set filter parameters and click ‘Go’ to filter items in the list. Click the header of any column to sort items in the list. Click the triangle beside the header to reverse the sort. Click a student’s name to grade his/her assignment. Hover over an Item Name and click the dropdown (not shown in this image) to grade all student submissions for that item. Customize your paging preferences with the buttons at the bottom of the page.
If you have questions, please contact elearningfacilitator@tru.ca.
Submitting an Assignment
Please follow these instructions for submitting an assignment in Blackboard Learn.
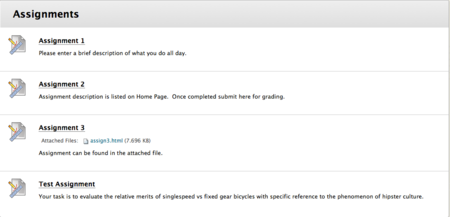
- 1. If you haven’t already, click ’Assignments’ in the Table of Contents.
- 2. Click the title of the assignment that you need to submit.
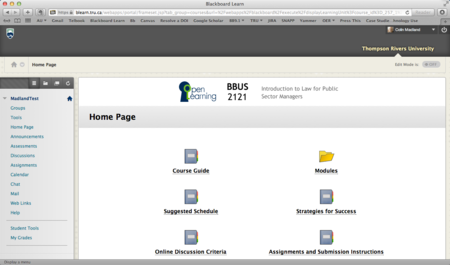
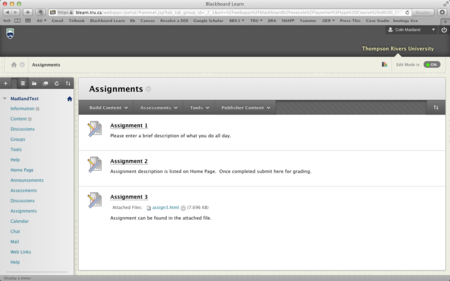
Please Note: If your assignments are displayed as icons in a grid (right), you will be directed to a page displaying only the assignment instructions (below). If this happens, please click the assignment title in the bottom left corner of the instructions to continue with the submission process.
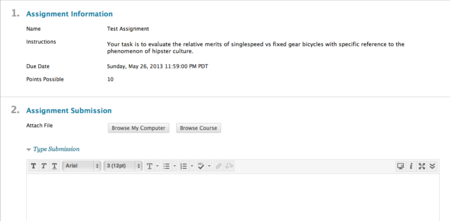
- 3. Review the instructions and expectations for the assignment. Click ‘Browse My Computer’ to attach a file from your computer.
OR Click ‘Type Submission’ to enter a response directly into Blackboard using the Content Editor.
- 4. If you attached a file from you computer, you will see it listed under ‘Attached Files’.
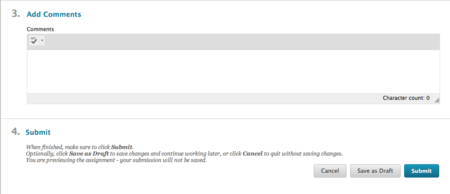
- 5. Add comments to your submission, if desired.
- 6. Click ‘Submit’.
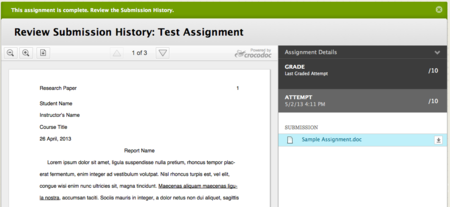
- 7. The green bar across the top will confirm your assignment submission. You should see your submission in the viewer and you should see the submission history on the right side of the page.
Tip:
Click the double chevron to expand the tools available in the Content Editor.
If you have questions, please contact itservicedesk@tru.ca.
Edit assignments
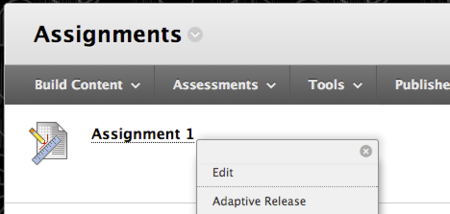
Click on the assignment and it will give you the 'edit' option.
Creating Assignments
Please follow these instructions to create an assignment in Blackboard Learn.
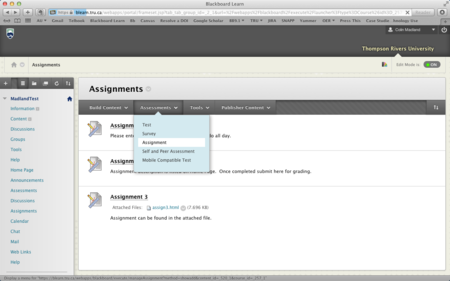
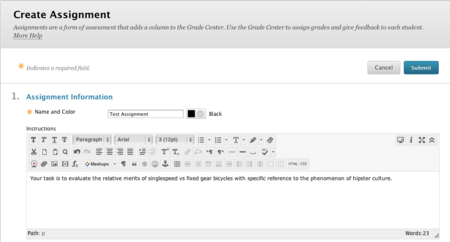
- 1. To create a new assignment, you must first toggle the Edit Mode to ‘On’, then hover your cursor over ‘Assessments’ and choose ‘Assignment’.
- 2. Enter a name and a description of the assignment using the Content Editor.
Tip: Changing the colour of the assignment will change the colour of the title in the list of assignments.
- 3. If you need to attach files, click ‘Browse my Computer’ or ‘Browse Course’. Enter the number of points possible. If you would like to associate a rubric with the assignment, follow the instructions contained in ‘Working with Rubrics’ available at the TRU Blackboard Support website.
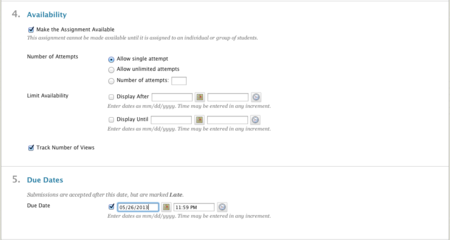
- 4. Adjust the dates that the assignment is available to students. You may want to click the box beside ‘Track Number of Views’.
- 5. Set the due date and time.
Tip: If you deliver a continuous entry course for Open Learning, you should leave this section blank.
- 6. Assign the item to all individual students or to groups. Click ‘Submit’.
- 7. You will see the green confirmation bar upon successful submission.
If you have questions, please contact elearningfacilitator@tru.ca.
Working with Rubrics
A well-designed rubric can benefit students, who can clearly see what the requirements for a particular assignment are, and also faculty who have a published standard by which they will assess each student’s work.
- 1. You can create a rubric while you are creating an assignment, or you can edit an existing assignment to add a rubric. Under the Grading section, hover your cursor over ‘Add Rubric’ and choose ‘Create New Rubric’.
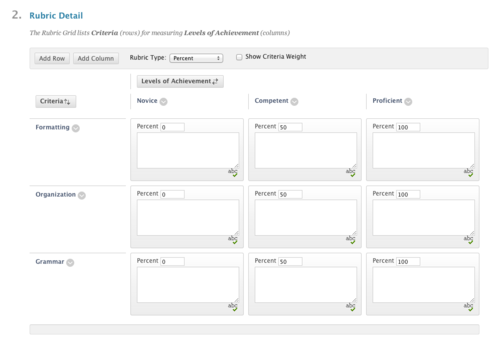
- 2. Enter a name and description for the rubric. Overview of Rubric Details Add rows or columns. Change the rubric type. Click the chevron beside a criterion or level of achievement to edit the default titles.
The levels of achievement values will change depending on the type of rubric. Enter descriptors of each level of achievement in the text boxes.
- 3. Click ‘Submit’.
- 4. Confirm the details of the rubric in the yellow bar in the assignment details. The rubric creation screen will open in a new window.
Tip: Hover your cursor over the buttons for more options.
- 5. Scroll down and click ‘Submit’ to save the assignment settings.
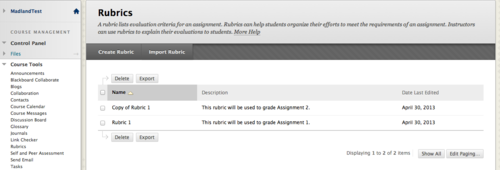
- 6.You can access, view, manage and create rubrics by clicking ‘Course Tools’ under ‘Course Management’ and then clicking ‘Rubrics’.
