Difference between revisions of "Documentation:Moodle Support Resources/Creating Groups"
Jump to navigation
Jump to search
ColinMadland (talk | contribs) m |
ColinMadland (talk | contribs) |
||
| Line 30: | Line 30: | ||
[[File:Moodle Groups 5.png|centre|frame]] | [[File:Moodle Groups 5.png|centre|frame]] | ||
| + | |||
| + | |||
| + | =Allocating Students= | ||
| + | |||
| + | ===From the list of groups, click on the first group, then click 'Add/remove users'.=== | ||
| + | |||
| + | |||
| + | [[File:Allocate Students 1.png|centre|frame]] | ||
| + | |||
| + | |||
| + | ===Select the student(s) from the list on the right, and click 'Add'.=== | ||
| + | |||
| + | |||
| + | [[File:Allocate Students 2.png|centre|frame]] | ||
| + | |||
| + | |||
| + | ===Click 'Back to groups' to select the next group.=== | ||
| + | |||
| + | [[File:Allocate Students 3.png|centre|frame]] | ||
Revision as of 11:16, 22 March 2016
Creating Groups
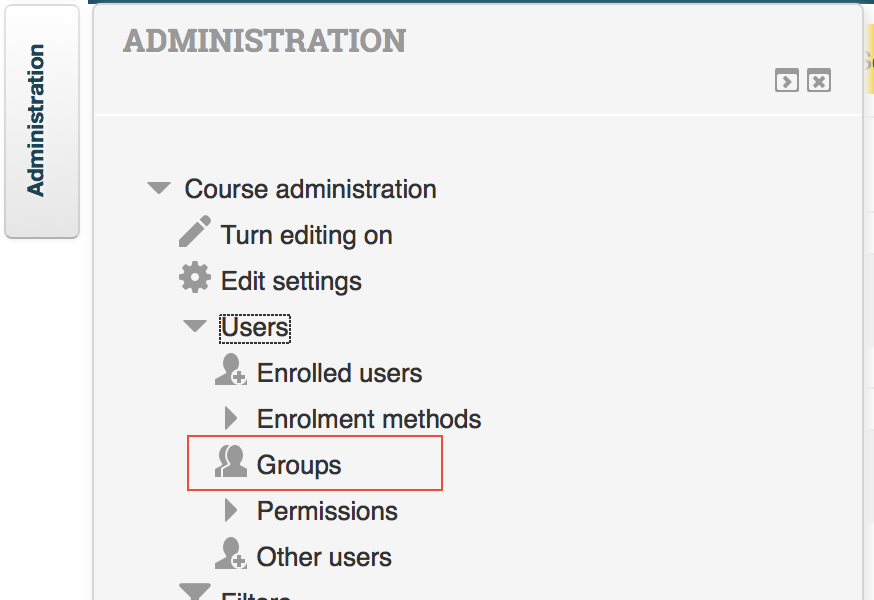
In the 'Administration' block, click 'Users', then 'Groups'.
Click 'Create Group' to create a single group, or 'Auto-create groups' to create multiple groups.
Provide a name for the groups.
Indicate how you want students allocated to the groups. Choose 'No allocation' to manually allocate students.
Click 'Submit' to save your settings.
Allocating Students
From the list of groups, click on the first group, then click 'Add/remove users'.
Select the student(s) from the list on the right, and click 'Add'.


