Difference between revisions of "Documentation:Blackboard Learn Support Resources/Creating and Using Blog"
Jump to navigation
Jump to search


| Line 1: | Line 1: | ||
[[File:D|thumbnail]] | [[File:D|thumbnail]] | ||
| − | + | =Instructions for Blackboard Learn 9.1: Creating & Using Blogs= | |
'''The blog tool allows students to create and share an online reflective diary for coursework. Follow these instructions to create a blog and edit its settings.''' | '''The blog tool allows students to create and share an online reflective diary for coursework. Follow these instructions to create a blog and edit its settings.''' | ||
| − | + | ===Click the link to the blog tool (you may have to add the tool to a content area first).=== | |
[[File:Blog_1.png|450px|centre]] | [[File:Blog_1.png|450px|centre]] | ||
| − | + | ===Before students can access a blog, the instructor must first create a blog and adjust its settings to make it accessible.=== | |
Click ‘Create Blog’. | Click ‘Create Blog’. | ||
[[File:Blog_2.png|450px|centre]] | [[File:Blog_2.png|450px|centre]] | ||
| − | + | ===Give the blog a name and provide instructions.=== | |
[[File:Blog_3.png|450px|centre]] | [[File:Blog_3.png|450px|centre]] | ||
| − | + | ===Make the blog available to students and set any date or time restrictions that are necessary.=== | |
[[File:Blog_4.png|450px|centre]] | [[File:Blog_4.png|450px|centre]] | ||
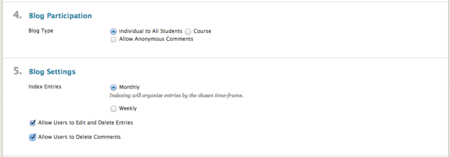
| − | + | ===Choose whether the blog will be assigned to all students individually or whether it will be a course blog and whether anonymous comments will be allowed.=== | |
| − | Adjust the blog settings with respect to indexing and allowing users to edit or delete items.[[File:Blog_5.png|450px|centre]] | + | Adjust the blog settings with respect to indexing and allowing users to edit or delete items. |
| − | + | [[File:Blog_5.png|450px|centre]] | |
| − | + | ===If the blog is to be graded, you may indicate a due date and attach or create a rubric.=== | |
| + | [[File:Blog_6.png|450px|centre]] | ||
| + | ===Click ‘Submit’ to save your work.=== | ||
| + | [[File:Blog_7.png|450px|centre]] | ||
If you have questions, please contact elearningfacilitator@tru.ca. | If you have questions, please contact elearningfacilitator@tru.ca. | ||
Latest revision as of 17:42, 29 January 2015
Instructions for Blackboard Learn 9.1: Creating & Using Blogs
The blog tool allows students to create and share an online reflective diary for coursework. Follow these instructions to create a blog and edit its settings.
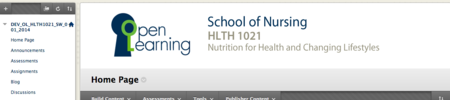
Click the link to the blog tool (you may have to add the tool to a content area first).

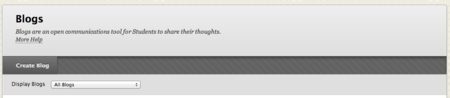
Before students can access a blog, the instructor must first create a blog and adjust its settings to make it accessible.
Click ‘Create Blog’.

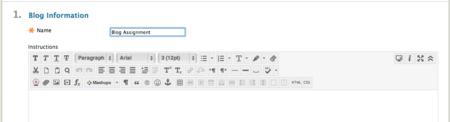
Give the blog a name and provide instructions.

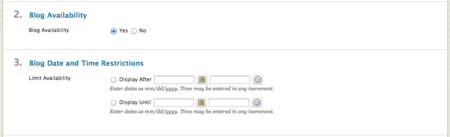
Make the blog available to students and set any date or time restrictions that are necessary.

Choose whether the blog will be assigned to all students individually or whether it will be a course blog and whether anonymous comments will be allowed.
Adjust the blog settings with respect to indexing and allowing users to edit or delete items.

If the blog is to be graded, you may indicate a due date and attach or create a rubric.

Click ‘Submit’ to save your work.

If you have questions, please contact elearningfacilitator@tru.ca.