Difference between revisions of "Documentation:Blackboard Learn Support Resources/Blog entries"
Jump to navigation
Jump to search
| Line 4: | Line 4: | ||
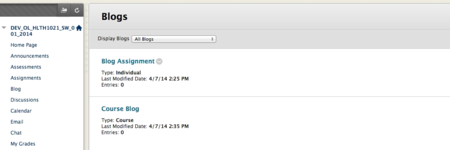
* 1. Click the link to the Blog tool and choose the blog to which you need to post. | * 1. Click the link to the Blog tool and choose the blog to which you need to post. | ||
| − | [[File: | + | [[File:Blog_Entry_1.png|450px|centre]] |
* 2. Click ‘Create Blog Entry’. | * 2. Click ‘Create Blog Entry’. | ||
* 3. Give your topic a title and enter the body of your post in the content editor. | * 3. Give your topic a title and enter the body of your post in the content editor. | ||
* 4. Attach any necessary files. Click ‘Save Entry as Draft’ to work on it later. Click ‘Post Entry’ to post to the blog. | * 4. Attach any necessary files. Click ‘Save Entry as Draft’ to work on it later. Click ‘Post Entry’ to post to the blog. | ||
* 5. Click the ‘Comment’ button to respond to your or your classmate’s post. | * 5. Click the ‘Comment’ button to respond to your or your classmate’s post. | ||
Revision as of 12:45, 26 January 2015
Instructions for Blackboard Learn 9.1: Blog Entries
Follow these instructions to create a blog entry in Blackboard Learn.
- 1. Click the link to the Blog tool and choose the blog to which you need to post.

- 2. Click ‘Create Blog Entry’.
- 3. Give your topic a title and enter the body of your post in the content editor.
- 4. Attach any necessary files. Click ‘Save Entry as Draft’ to work on it later. Click ‘Post Entry’ to post to the blog.
- 5. Click the ‘Comment’ button to respond to your or your classmate’s post.